Planner
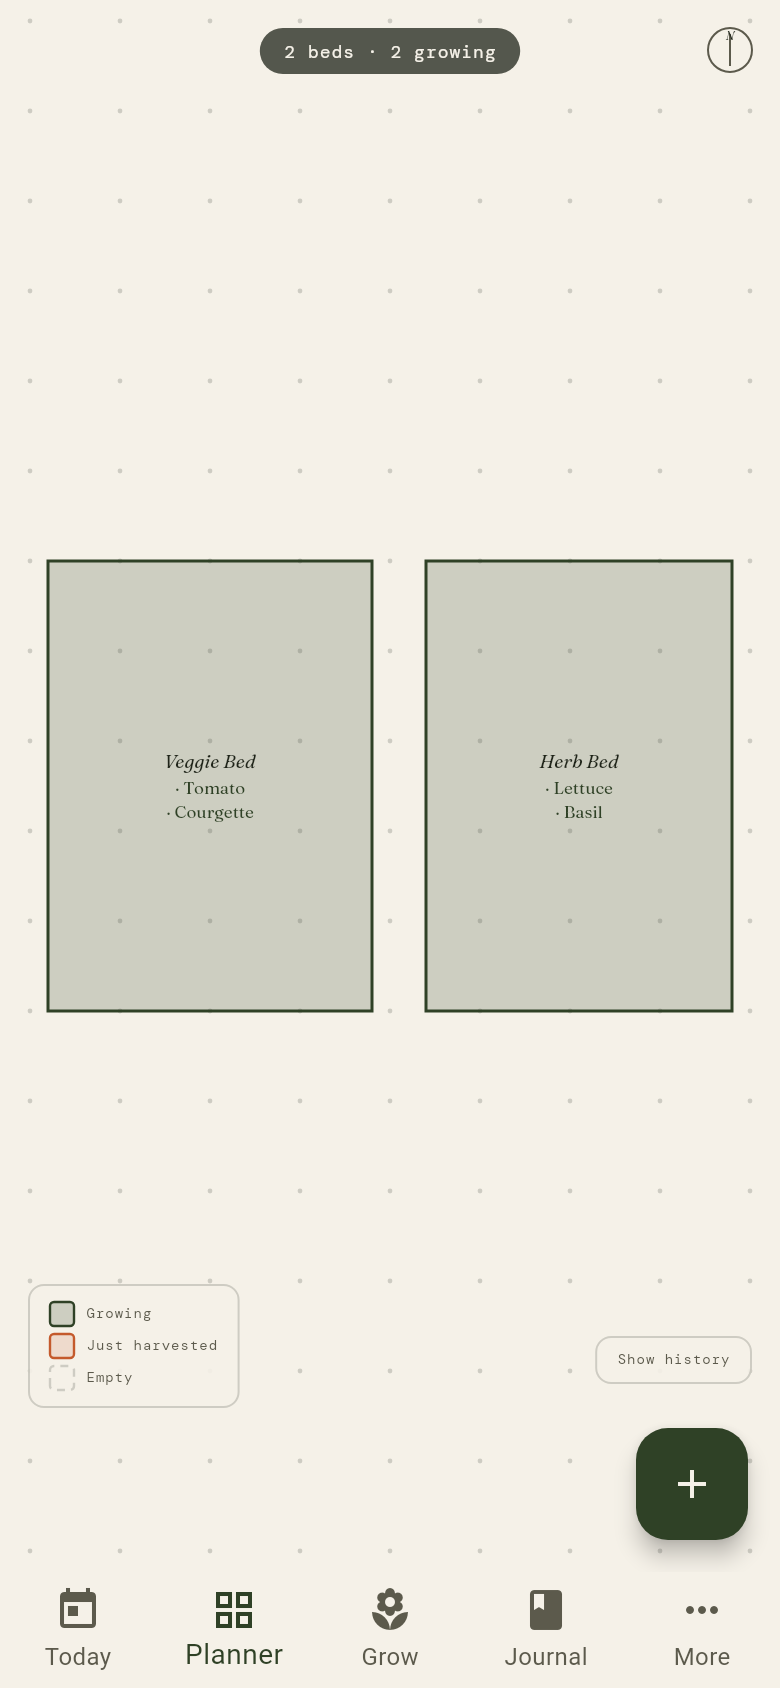
The Planner shows all your garden beds drawn to scale. Each bed displays what is currently growing inside it. Tap any bed to manage its plantings.
Bed overview
On the Planner canvas you can see:
- The shape and name of each bed
- Coloured markers for active plantings
- The sunlight setting (full sun, partial shade, full shade)
Pinch to zoom in and out. Drag to pan around your garden. The Planner opens with all your beds in view.
Adding a bed
Tap + on the Planner to add a new bed. Adding a bed takes two steps.
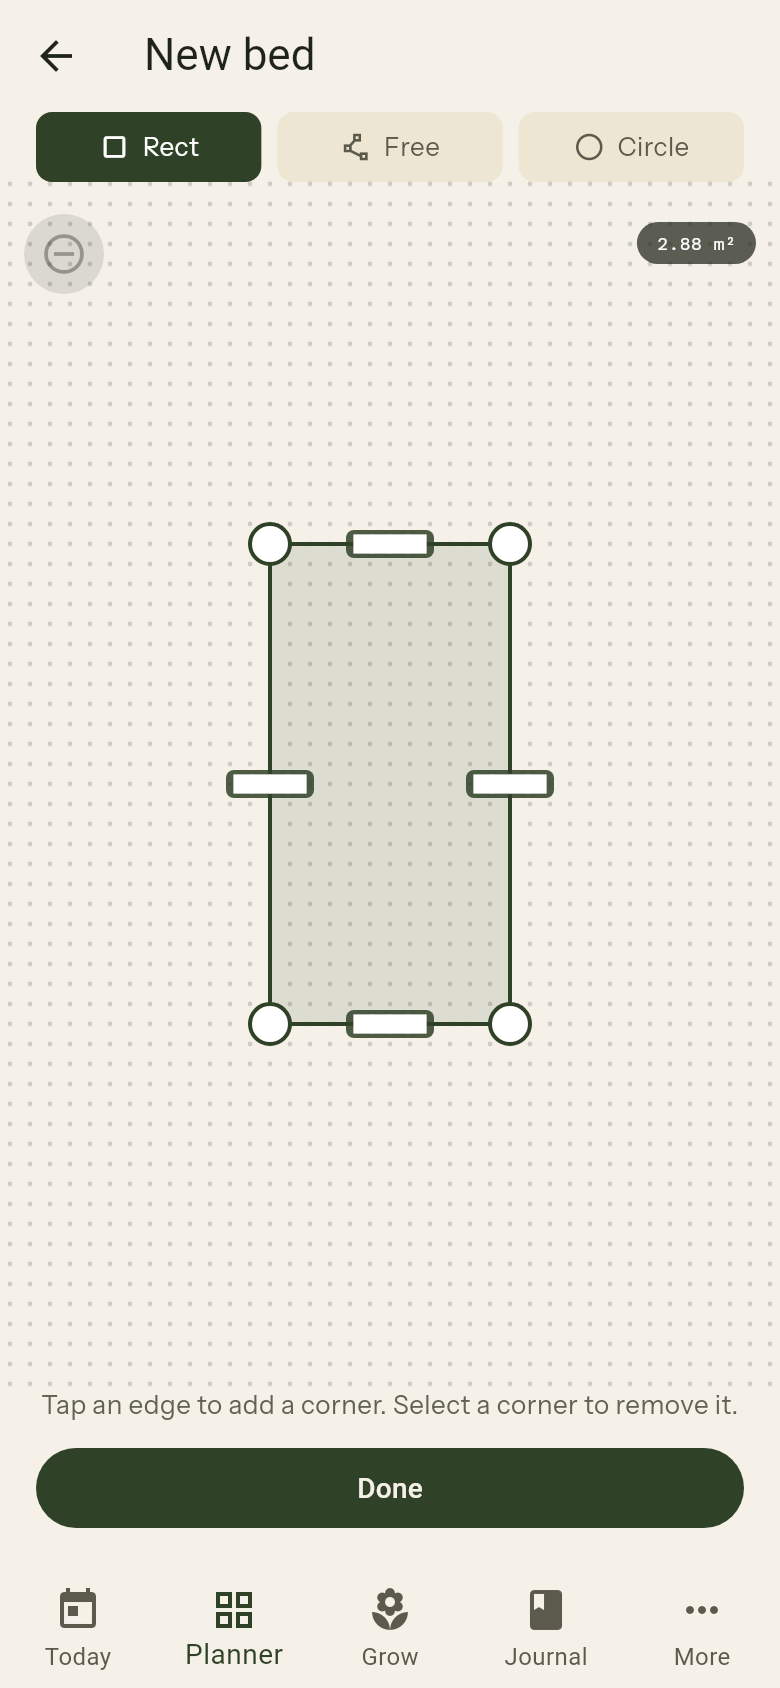
- Draw the shape. Pick a tool: Rect, Free or Circle, and drag the handles until the shape matches your bed. If a free-form shape crosses itself, the app asks you to adjust the handles. Switching tool asks Change tool?, because the new tool replaces the current shape. To add or remove a corner, tap an edge or select a corner and tap Remove corner; see "Editing the shape of a bed" below. Tap Done when you are happy with the shape
- Name and sunlight. Enter the Bed name and choose the Sunlight: Full sun, Partial or Shade. Tap Save bed
The app confirms with Bed added and the new bed appears on the Planner canvas, beside your existing beds so that they do not overlap.
Opening a bed
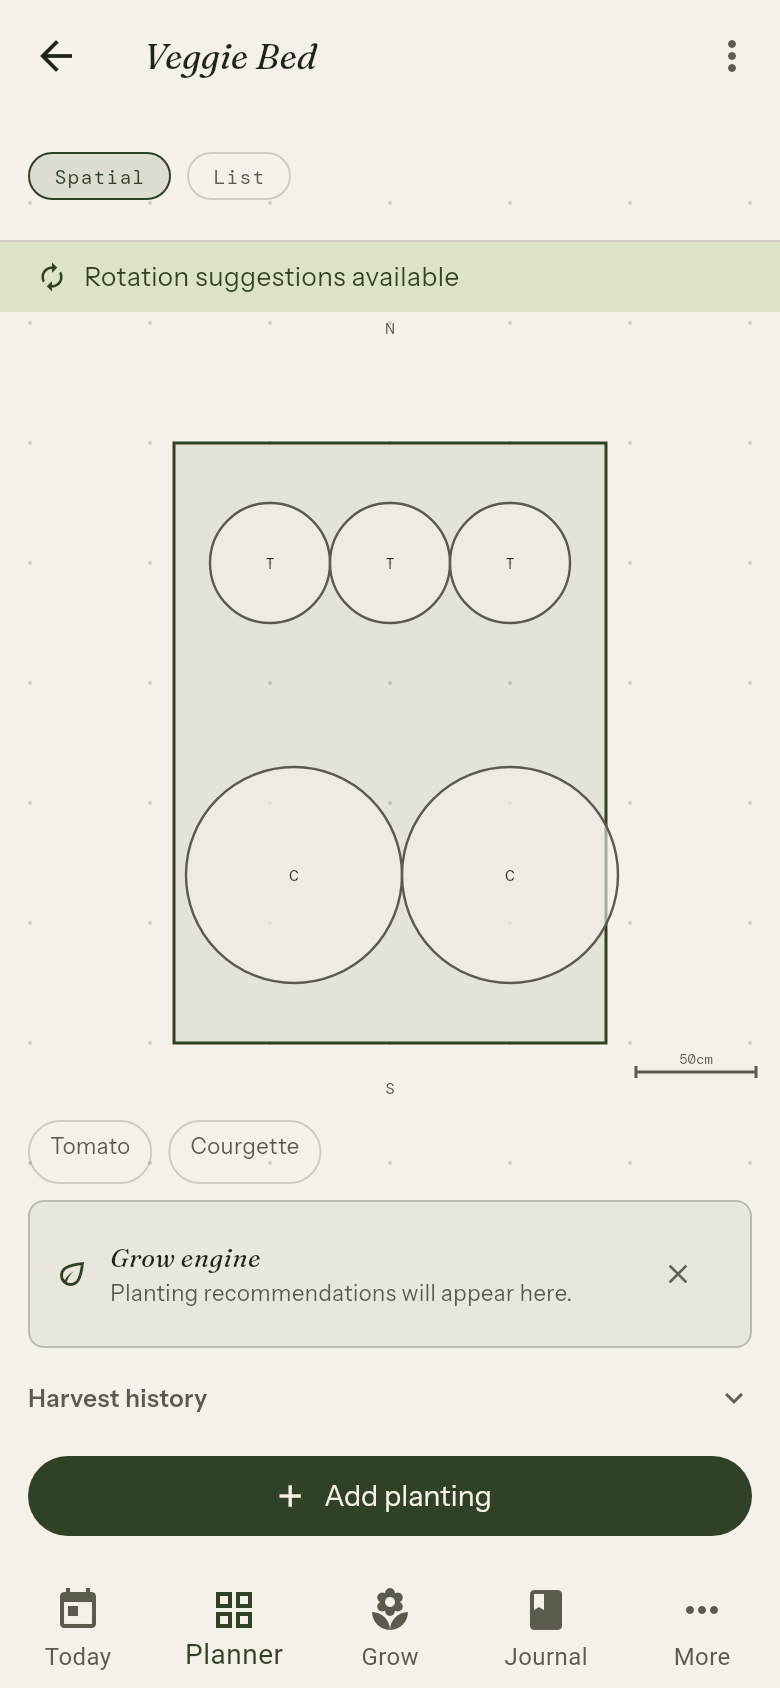
Tap a bed to open its detail view. You see a list of all active plantings with their current growth status:
| Status | Meaning |
|---|---|
| Just sown | Recently planted, not yet established |
| Established | Plant has taken root and is actively growing (from 8 days after sowing) |
| Maturing | Growing towards harvest |
| Harvested | Crop has been harvested and removed |
In the bed drawing, each placed plant is a circle that shows the space it needs; a red outline means two plants are too close together.
Adding a planting
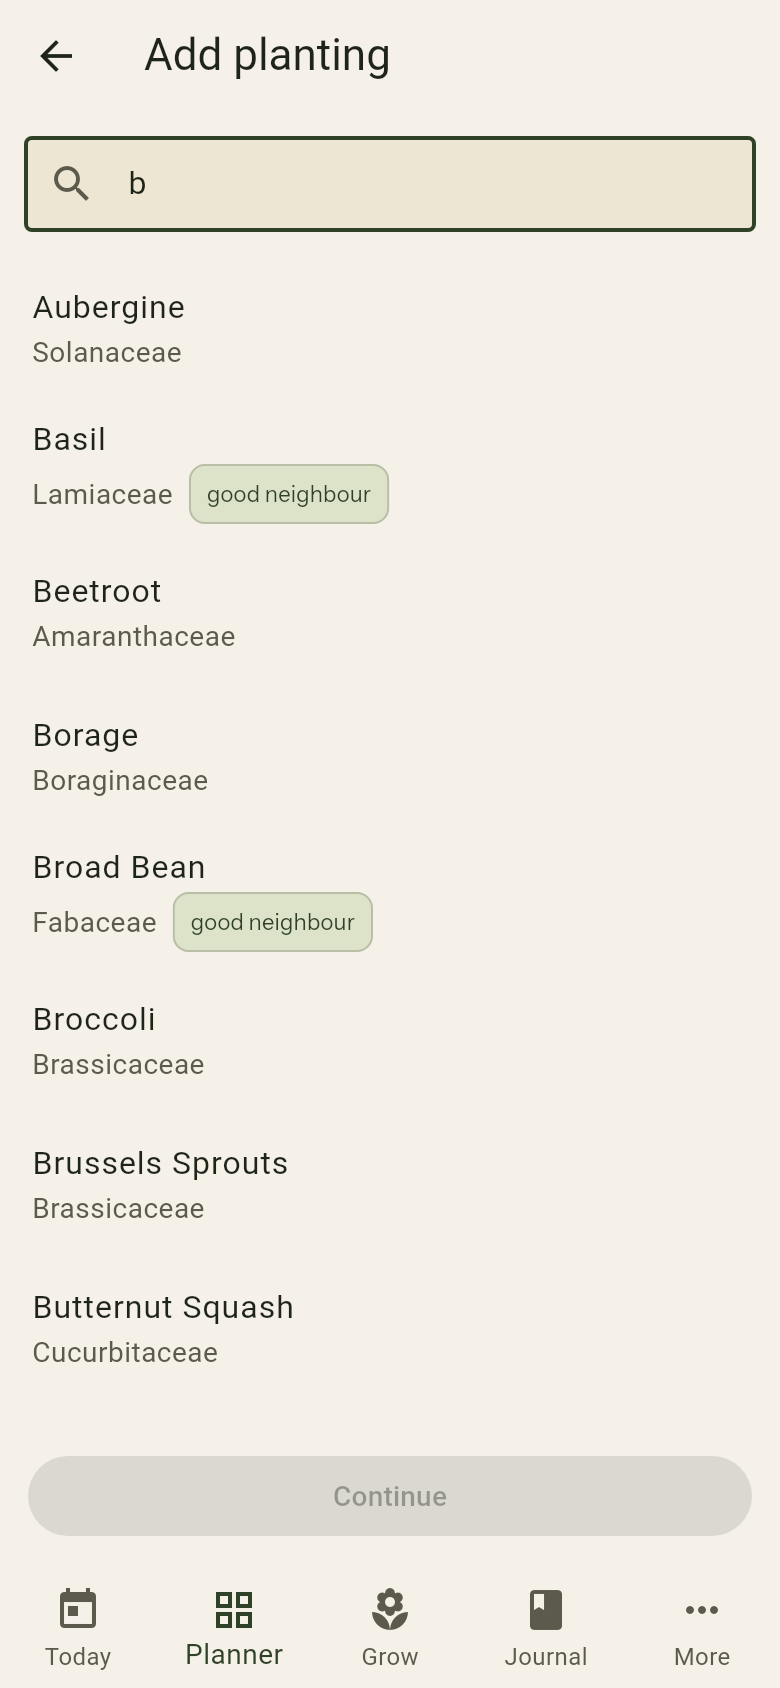
- Open a bed and tap Add planting
- Search by crop name or plant family
- Select a crop from the list
- Set the quantity (number of plants) using the +/− stepper
- Tap Continue
If the crop has a spacing value set, the app opens the placement screen so you can position the plants visually inside the bed.
Each plant is drawn as a circle that shows the space it needs (the crop's spacing, or 30 cm when none is set). Plants already in the bed and plants on the other crop tabs are drawn too. Circles that overlap turn red, and a warning appears when a plant you place is too close to another. This is only a warning: you can still place the plant. Before you place a plant, a circle follows your pointer (with a finger, it shows under your finger while you hold it down) so you can see where it will go. Tap or release inside the bed to place the plant. Drag a placed circle to move it; if you let go outside the bed it goes back. Press and hold a circle without moving to remove it.
Companion planting chips
While browsing crops to add, you may see coloured chips next to crop names:
- good neighbour (green) — this crop benefits from or benefits the plants already in the bed
- conflict (red) — this crop has a known negative interaction with something already growing here
Conflict crops can still be planted — the chip is a warning, not a block. The app never prevents you from planting a conflicting crop. If space is tight, consider planting conflict crops in a different bed. Companion warnings cannot be globally disabled.
Adding a custom crop
If your crop is not in the built-in library, scroll to the bottom of the crop list and tap Add custom crop. The New crop form opens: enter the name, pick the family, enter the spacing and tap Save. The custom crop is added to your library and selected immediately.
You can change the growing details (spacing, days to maturity, watering interval and more) later from the Grow tab.
Ending a planting
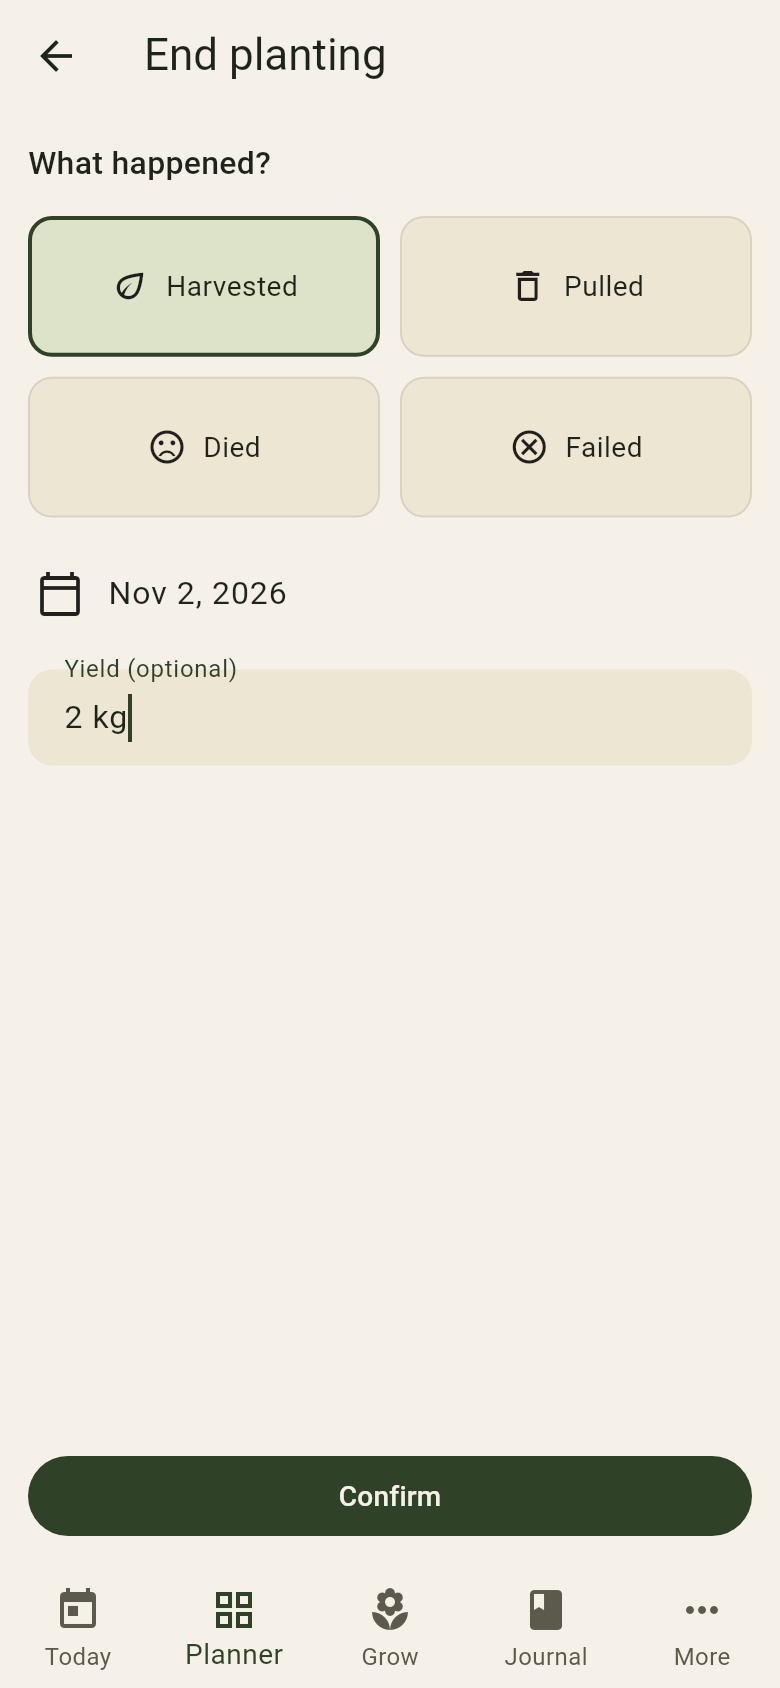
When a crop is finished for the season:
- Tap the planting in the bed detail view
- Tap End planting
- Choose a reason:
- Harvested — the final harvest is done
- Pulled — deliberately removed before maturity (e.g., thinning seedlings, clearing space for a new crop)
- Died — lost to pests, disease, or weather
- Failed — seeds never came up
- Optionally add a yield note
- Tap Confirm
The app logs the event in your journal automatically.
Logging fertilizer
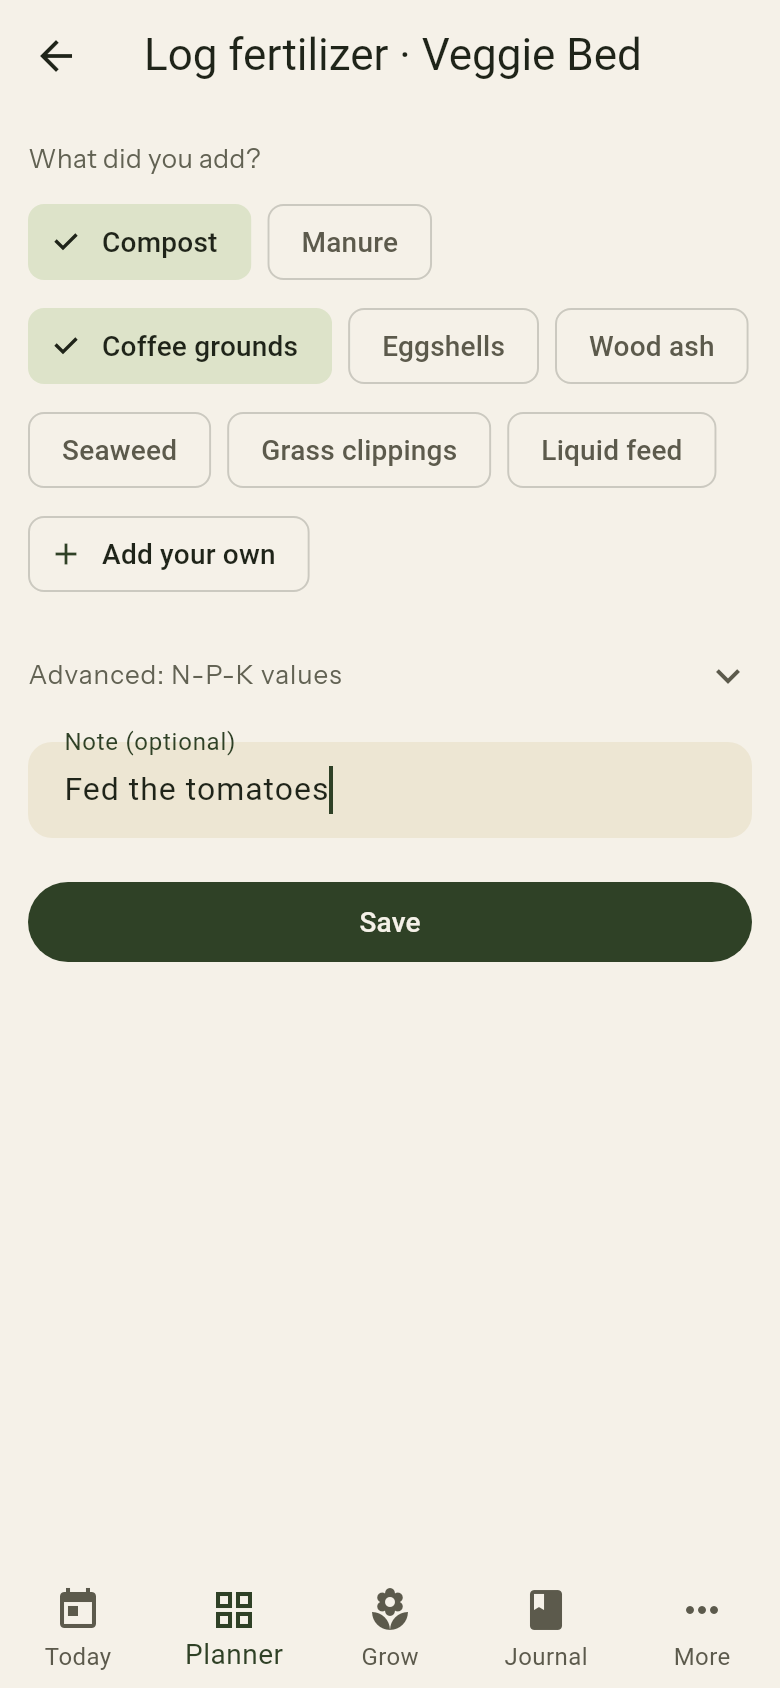
To record a fertilizer application:
- Open a bed
- Tap the menu (⋮) on a planting
- Tap Log fertilizer. The screen opens with the bed name in its title; use the back arrow to leave without saving
- Tap what you added: Compost, Manure, Coffee grounds, Eggshells, Wood ash, Seaweed, Grass clippings or Liquid feed. You can pick more than one. Tap Add your own to add a material that is not in the list; it stays available for your next entries, and the small × on it removes it from your list again. Add an optional note (e.g. "Tomato feed 5ml/L")
- Tap Save
The fertilizer log is saved to your journal with the materials you picked. If you work with NPK values, open Advanced: N-P-K values and enter them there; they are saved with the entry as well. Fertilizer can only be logged from the Planner — there is no fertilizer option on the Today screen.
Crop rotation suggestions
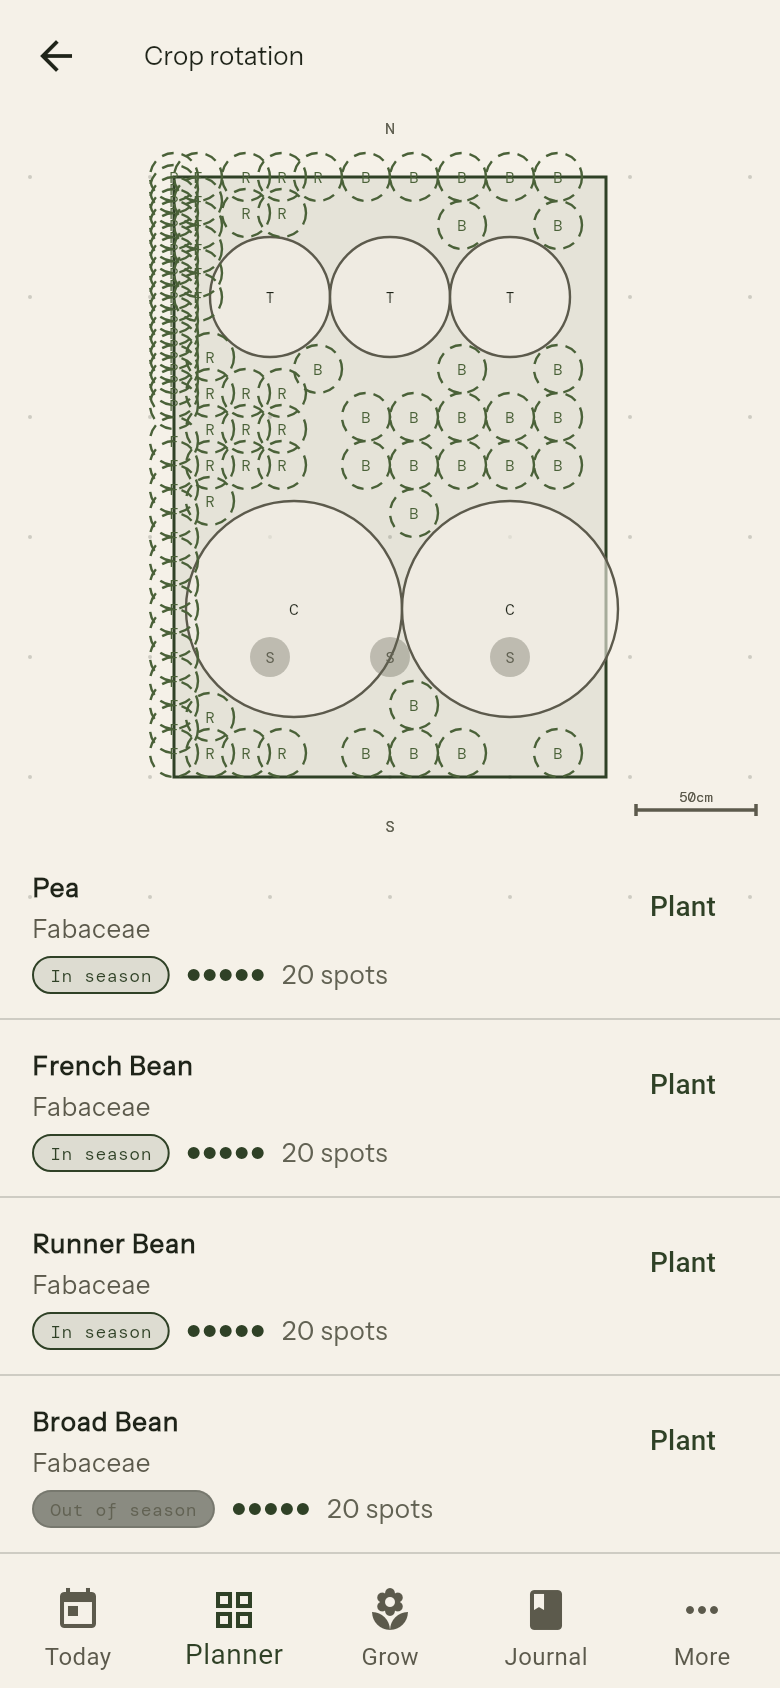
Tap the rotation icon in a bed to see which crop families have grown there in past seasons and which families are recommended next. The app builds this history from your ended plantings — the more seasons you record, the better the suggestions. Rotating families helps prevent soil-borne diseases from building up.
Renaming beds
Long-press a bed on the Planner canvas, or tap the menu inside the bed detail, to rename it.
Moving a bed
Press a bed on the Planner canvas and drag it to a new place. Release to drop it. Drag empty space instead to move the whole canvas. The bed snaps to a small grid and keeps some space around it, so beds never overlap. If there is no room at the spot where you let go, the bed returns to where it was. The plantings stay in the bed. After a move, a message with Undo appears for a few seconds; tap it to put the bed back exactly where it was. A long-press without moving opens the menu instead.
Editing the shape of a bed
Long-press a bed on the Planner canvas, or tap the menu inside the bed detail, and choose Edit shape. The shape editor opens on the current outline of the bed.
- Drag a handle to move a corner
- Tap an edge to add a corner there
- Tap a corner to select it, then tap Remove corner to delete it. A long-press on a corner removes it too. A bed always keeps at least 3 corners
- Tap Done to save the new shape, or go back to discard your changes
The area is recalculated. The position of the bed on the Planner and its name and sunlight stay the same. The tools Rect, Free and Circle are not shown here, and you cannot drag the whole outline, because the plantings keep their place inside the bed.
If some plantings would end up outside the new shape, the app asks "1 planting would be outside the new shape. Save anyway?". Choose Save anyway to keep the new shape (the plantings stay where they are) or Cancel to go back and adjust the shape.
The same corner actions work when you draw a new bed: tap an edge to add a corner, and select a corner to remove it. Adding or removing a corner switches the tool to Free and keeps your shape.